" ශ්‍රී ලාංකීය අභිමානය " ශ්‍රී ලංකාවේ කොල්ලො කෙල්ලොන්ට 2023 සිරාම බ්ලොග් එක.. Blog Eka.. ப்லொக் எக.. "ALLSRILANKANS BLOG"

This is default featured slide 1 title

Go to Blogger edit html and find these sentences.Now replace these sentences with your own descriptions.

This is default featured slide 2 title

Go to Blogger edit html and find these sentences.Now replace these sentences with your own descriptions.

This is default featured slide 3 title

Go to Blogger edit html and find these sentences.Now replace these sentences with your own descriptions.

This is default featured slide 4 title

Go to Blogger edit html and find these sentences.Now replace these sentences with your own descriptions.

This is default featured slide 5 title

Go to Blogger edit html and find these sentences.Now replace these sentences with your own descriptions.

Showing posts with label Future. Show all posts

Monday, April 10, 2017

SLT එක්ක අවුරුදු කමුද?


SLT එක්ක අවුරුදු කමුද? මෙන්න අවුරුදු ක්‍රීඩා එහෙම කරලම ඔයාලට කැමති තරම් ඩේටා වැඩි කරගන්න එන්න අදම SLT එකක් අවුරුදු කන්න .,.,

Share:

Wednesday, December 7, 2016

How To Find Installation Date Of Our Windows And Linux PC "OS"


Finding Installation Date and Uptime in Windows PC

Finding the uptime in a Windows PC is very easy and many of you might be knowing this method. It simply involves opening the Task Manager and navigating to the Performance tab.

There, under the CPU tab, you’ll find the uptime stat of your Windows PC in the Days:HH:MM:SS format.


To find the installation date of a Windows computer, you need to open the Command Prompt. To do this, either execute CMD command in the Run window or press Win+R key.

Now, run the following command on Windows 10 and Windows 8 to find the installation date of your operating system:

systeminfo | find /i “Original”

For Windows 7 operating system, your need to run the following command:

systeminfo | find /i “install date”

Finding installation date and uptime in Linux PC

Just like Windows, finding the installation date and uptime in your Linux PC is any also an easy task. To find the uptime in Linux, simply open the terminal and run the following command. I ran this on my Ubuntu 16.10 system and it should also work on other distributions as well.

uptime

To find the installation date in Linux, you need to find a file, folder, or log that was created during the installation time. One such file can be accessed by running the following command. This makes it easy to spot the installation date of your Linux-based operating system.

ls -l /var/log/installer
Share:

Monday, October 24, 2016

Apple Plans To Remove USB Ports From Upcoming MacBooks


After Killing iPhone’s 3.5mm Jack, Apple Plans To Remove USB Ports From Upcoming MacBooks
Share:

රැම් එකෙයි හාඩ් එකෙයි මදර් බෝර්ඩ් එකෙයි සීරියල් ටික ඩොස් වලින් හොයා ගමුද


Get serial number for RAM, Motherboard, Hard-disk


හරි ඔන්න යාලුවනේ මම අද ආවේ ඔයාලට තවත් වටිනා කියන පෝස්ටුවක් අරගෙන. මේක ගැන කියනවනම් ඔයාලා හැමෝම දන්නවනේ අපේ පරිගණකයේ ගොඩාක් දෘඩාංග කොටස් තියනවා ඉතින් මේවගෙන් සමහර ඒවා සිස්ටම් එක ඇතුලේ තියෙන්නේ ඔන්න මම අද කියලා දෙන්න යන්නේ මේ සිස්ටම් එක ඇතුලේ තියන කොටස් වල සීරියල් ටික මැෂින් එක ගලවන්නේ නැතුව බලාගන්න විදිය ඔයාලත් කරලා බලන්නකෝ එහෙනම්.

මම මේ පොස්ටුව විශේෂයෙන්ම හැදුවේ පරිගණක විද්‍යාගාර භාර ගුරුවරුන්ට. අලුත් තාක්ෂණික විද්‍යාගාරයේ පොත් සම්පුර්ණ කරද්දී ඕන වෙයි. ඉතින් මැෂින් එක ගලවලා දඟලල හොයන්න දෙයක් නෑ මෙන්න මැෂින් එක ON එකේ තියෙද්දීම ඩොස් වලට ගිහින් බලාගන්න.

This post explains how to find serial number for various hardware devices – RAM, Hard disk, Motherboard, CD Rom on a computer. We can use WMIC command to find this information.  These commands can be executed from Windows command prompt.

එහෙනම් මුලින්ම ඔයාලා රන් බොක්ස් WIN+R එකට ගිහින් CMD කියලා ගහලා DOS (Command Comport) වලට යන්න.

Get serial number of RAM chips.
wmic memorychip get serialnumber

This command lists serial number for each RAM module installed on the computer. Example below.

Example:
c:\>wmic memorychip get serialnumber
SerialNumber
91AB9A10
9EBD9A10

Get serial number for hard disks
wmic diskdrive get serialnumber

Example:
c:\>wmic diskdrive get serialnumber
SerialNumber
FR3AG13032430BC13S

Get serial number for mother boards
wmic baseboard get serialnumber

Get Serial number for cdrom drive
wmic cdrom where drive='d:' get SerialNumber

Replace ‘d:’ with the drive letter for the cdrom on your computer. You get error ‘No Instance(s) available’ if you don’t have CDROM drive on your computer.

Example:
c:\>wmic cdrom  get SerialNumber
No Instance(s) Available.

Share:

Monday, June 13, 2016

අලුත්ම නිල් දත හෙට අනිද්දා නෙවෙයි ඉන් අනිද්දා - BLUETOOTH 5


හායි යාලුවනේ ඔන්න මම අද ආවේ අලුත්ම නිවුස් එකක් අරගෙන ඒ තමයි අපි හැමෝම දැනට භාවිතා කරන ඉක්මනින්ම නැති වෙලා යන්න ඉඩ තියන නිල්දත් එහෙමත් නැත්නම් BLUETOOTH ගැන අලුත්ම නිවුස් එකක් ගැන කියන්න.

ඉතින් ඒ තමයි අපි දැනට භාවිතා කරන්නේ BLUETOOTH 4 වෙනුවට ඔන්න එයාලගේ අලුත්ම එක BLUETOOTH 5 මේ සතියේ එලියට දානවලු. ඉතින් BLUETOOTH නැති වෙන්නේ නැති වෙයි මොන විදියකින් හරි අපිට ආයෙමත් මේක ඕන වෙයි. එහෙනම් මෙන්න මේ ගැන මෙයාලා කියන්නේ මේ විදියට.

Making Bluetooth communication much faster, the Bluetooth Special Interest Group is releasing Bluetooth 5 next week. This new standard will make Bluetooth four times the present range and twice as fast as the current speed.


Mark Powell මේ ගැන කියනෙන් මෙන්න මෙහෙම කතාවක්. එක බලන්න පල්ලෙහා ලින්ක් එකට යන්න.

Share:

Wednesday, May 18, 2016

ඔබේ පරිගණකය කෘතීම බුද්ධියක් කරගමුද? ARTIFICIAL INTELLIGENCE --> මේවා අපෙන් විතරයි ...


හායි යාලුවනේ ඔන්න අද අපි ආවේ වෙනද වගේම හොට් නිවුස් එකක් අරගෙන මේ තමයි කෘතීම බුද්ධිය හරි එහෙනම් අපි බලමු මේ මොකක්ද කියලා.

හරි ඔන්න මම අද අරගෙන ආවේ පොඩි සොෆ්ට්වෙයා කෑල්ලක් ඇත්තටම මේක 27 MB වගේ පොඩි එකක් උනාට මේකෙන් කරන්න පුළුවන් දේවල් නම් ගොඩාක් තියනවා. අද මමත් මගේ මැෂින් එකට දාලා බැලුවා පට්ට ආ. ඔයාට ඔයාගේ විස්වාසවන්තම යාළුවා කර ගන්න පුළුවන්. 

යාලුවෙක් වගේම මේකෙන් තව ගොඩාක් දේවල් කර ගන්න පුළුවන් ඔයාට නිකන් ඉන්න වෙලාවට මෙය එක්කන් කතා කරලා ඔයාගේ ඉංග්‍රීසි දැනුම වැඩි කර ගන්න වගේම අපේ වොයිස් එකෙන්ම මෙයත් එක්කන් කතා කරන්න පුළුවන්. හරි එහෙනම් මෙන්න මෙයා ගැන තවත් විස්තර. අපි එහෙනම් තවත් අලුත් දෙයකින් ඉක්මනින්ම හමු වෙමු ...

Braina is an AI-based virtual assistant something to be talked about. It outpowers ubiquitous assistant like Siri and Cortana easily because it offers a plethora of functionalities which can make it sit comfortably at the fountainhead in terms of the AI-based virtual assistants. 

ARTIFICIAL INTELLIGENCE (AI) VIRTUAL ASSISTANT SOFTWARE
Braina (Brain Artificial) is an intelligent personal assistant, human language interface and automation software for Windows PC that allows you to interact with your computer using voice commands in English language.
Braina makes it possible for you to control your computer using natural language commands and makes your life easier. Braina is not a Siri or Cortana clone for PC but rather a powerful personal and office productivity software. It isn't just like a chat-bot; its priority is to be super functional and to help you in doing tasks. You can either type commands or speak to it and Braina will understand what you want to do. Moreover, using speech recognition built in Braina for Android App you can interact with your computer from anywhere in your house over a WiFi network.

Artificial Brain
Braina is a result of solid research work done in the field of artificial intelligence. We are working to make Braina a digital assistant that can understand, think and even learn from experience like a human brain. Braina does language understanding and learns from conversation as shown below.


Share:

Tuesday, May 17, 2016

Future Of Wireless "WIFI" — 802.11ah Wi-Fi Penetrates Walls Easily Using Less Power


IEEE 802.11ah is supposed to solve the problem of signal strength across concrete walls and windows. It solves this problem by operating at a lower frequency than the existing ones. Thus, the devices also need to consume less power in transmitting and receiving signals. 

We always complain regarding the slow speed of our internet connection and look for better speed even behind the walls. But, the Wi-Fi alliance thinks that they have come up with a solution to that in the form of 802.11ah.

802.11 ah is another IEEE standard wireless networking protocol which operates in the sub-one GHz (900MHz) band. The main intention of this newer wireless networking protocol is to provide support to Internet of Everything  (IoE) and also provide an extended range of Wi-Fi.

How 802.11 ah solves wall and other obstruction problem?

Today’s Wi-Fi standards like 802.11 a/ b/ g/ etc operate at high frequencies like 2.4GHz and/or 5GHz. Since their frequencies are so high, it becomes harder for them to maintain the signal strength as they pass through the walls.

Currently, 900MHz is an unlicensed spectrum. At a frequency like 900MHz, which is much lower to the above-mentioned frequencies, things like concrete walls, wooden windows, doors etc. would not pose a problem to the wifi access.

According to WiFi Alliance, 802.11ah is supposed to cover double the range of the current standards that is because the signal quality does not downgrade as the signal propagates. Also, devices would not have to burn out their battery in sending and receiving signals.

Share:

Sunday, May 8, 2016

How To Install Ubuntu Linux On Windows 10 In 24 Steps


Introduction

This guide will show you how to download and install Ubuntu Linux on Windows 10 in such a way that it won’t harm Windows.

The upside to following this guide is that Ubuntu Linux will only run when you tell it to and it doesn’t require any special partitioning of your disks.

The method used to install Ubuntu is to download a piece of software called Virtualbox from Oracle which allows you to run other operating systems as virtual computers on top of your current operating system which in your case is Windows 10.

What You Will Need

In order to install Ubuntu Linux on Windows 10 you will need to download the following applications:

Oracle Virtualbox (link tells you all about virtualbox)
Ubuntu (links to a review of Ubuntu)
Virtualbox Guest Additions (links to a description of guest additions) 

Steps Required To Run Ubuntu Linux On Windows 10

Download Oracle Virtualbox
Download Ubuntu
Download Virtualbox Guest Additions
Install Virtualbox
Create a Ubuntu virtual machine
Install Ubuntu
Install Virtualbox Guest Additions

1.  Download Oracle Virtualbox
To download Virtualbox visit www.virtualbox.org and click on the large download button in the middle of the screen. 

2.  32-Bit or 64-Bit
To find out whethe you are running a 32-bit or 64-bit system click on the Windows start button and search for PC Info.

Click on the link for “About your PC”.

The screen that appears tells you lots of useful information about your computer such as the amount of RAM, the processor and the current operating system.

The most important part however is the system type which as you can see from the image shows that my system is 64-bit. Using the same technique you can work out which system type your computer is.

3.  Download Ubuntu

To download Ubuntu visit www.ubuntu.com/download/desktop

There are two versions of Ubuntu available:

Ubuntu 14.04.3 LTS
Ubuntu 15.04 (soon to be Ubuntu 15.10)
Ubuntu 14.04 is for people who don’t want to upgrade their operating system every 6 months. The support period has a number of years to run and therefore it really is a case of installing it and getting on with your life.

Ubuntu 15.04, 15.10 and beyond are the latest releases and have more up to date developments which aren’t available in 14.04. The downside is that the support period is much shorter at just 9 months. The upgrade process isn’t a big deal but obviously requires more effort than just installing 14.04 and leaving it.

There is a big download link next to both versions and it is up to you whether you want to install 14.04 or 15.04 and beyond. The installation process doesn’t really change.

This guide shows the differences between the Ubuntu versions.

4.  Download Virtualbox Guest Additions

The guest additions makes it possible to run the Ubuntu virtual machine in full screen mode at a suitable resolution.

To download Virtualbox Guest Additions visit http://download.virtualbox.org/virtualbox

There are a lot of links on this page. Click on the link that matches the version of Virtualbox you downloaded previously.

When the next page opens click on the link for VBoxGuestAdditions.iso (There will be a version number as part of the link i.e. VBoxGuestAdditions_5_0_6.iso).

Click on the link and let the file download.

5.  How To Install VirtualBox

Press the start button and search for “Downloads”. Click on the link to the “Downloads” file folder.

When the downloads folder opens click on the Virtualbox application file you downloaded earlier on. 

The Virtualbox setup wizard will begin. Click on “Next” to start the installation.

6.  Where To Install Virtualbox
The next screen lets you choose the Virtualbox installation options.

There is absolutely no reason not to choose the defaults unless you want to choose a different installation location in which case click on “Browse” and navigate to where you want to install Virtualbox.

Click “Next”to continue.

7.  Create VirtualBox Desktop Icons
You now have the option to create shortcuts, either on the desktop and/or the quick launch bar and whether to register file associations such as VDI files to Virtualbox.

It is up to you whether you want to create shortcuts. Windows 10 is really easy to navigate with the powerful search button so you might decide not to bother creating either of the shortcuts.

Click “Next” to continue.

8.  Virtualbox Warns About Resetting Your Network Connection
A warning will appear stating that your network connection will temporarily be reset. If this is a problem to you right now then click “No” and come back to the guide at a later stage otherwise click “Yes”.

9.  Install VirtualBox
You are finally at the point of installing Virtualbox. Click the “Install” button.

A security message will appear asking whether you are sure you wish to install Virtualbox and halfway through the install you will be asked whether you want to install the Oracle Universal Serial Bus device software. Click “Install”.

10.  Create A Ubuntu Virtual Machine
You can start Virtualbox simply by leaving the “Start Oracle VM Virtualbox after installation” checked and clicking “Finish” or for future reference click the start button and search for virtualbox. 

Click on the “New” icon on the taskbar.

11.  Choose The Type Of Virtual Machine
Give your machine a name. Personally I think it is a good idea to go for the Linux distribution name (i.e. Ubuntu) and the version number (14.04, 15.04, 15.10 etc).

Select “Linux” as the type and “Ubuntu” as the version. Make sure you choose the correct version based on whether you have a 32-bit or 64-bit machine.

Click “Next” to continue.

12.  How Much Memory Do You Give Your Virtual Machine
You now have to choose how much of your computer’s memory you will assign to the virtual machine.

You cannot assign all of your computer’s memory to the virtual machine as you need to leave enough for Windows to continue running as well as any other programs that you have running within Windows.

The minimum you should consider assigning to Ubuntu is 2 gigabytes which is 2048 MB. The more you can give the better but don’t go overboard. As you can see I have 8 gigabytes of memory and I have assigned 4 gigabytes to the Ubuntu virtual machine.

Note that the amount of memory you set aside is only used whilst the virtual machine is running.

Slide the slider to the amount you want to assign and click “Next”. 

13.  Create A Virtual Hard Drive
After assigning memory to the virtual machine you now have to set aside some hard drive space. Select the “Create a virtual hard disk now” option and click “Create”.

There are a number of different hard drive types that you can choose from. Choose “VDI” and click “Next”.

There are two ways to create the virtual hard drive:

Dynamically allocated
Fixed size
If you choose dynamically allocated it will only use space as it is required. So if you set 20 gigabytes aside for the virtual hard drive and only 6 is required then only 6 will be used. As you install more applications the extra space will be allocated as necessary.

This is more efficient in terms of disk space usage but isn’t so good for performance because you have to wait for the space to be allocated before you can use it.

The fixed size option allocates all the space you request straight away. This is less efficient in terms of disk space usage because you may have set aside space you never actually use but it is better for performance. Personally I believe this to be the better option as your computer generally has more disk space than memory and CPU power.

Choose the option you prefer and click “Next”.

14.  Set The Size Of Your Virtual Hard Drive
Finally you are at the stage of setting how much space you wish to give to Ubuntu. The minimum is about 10 gigabytes but the more you can spare the better. You don’t have to go overboard though. If you are just installing Ubuntu in a virtual machine to test it out go for a smaller amount.

When you are ready click “Create” to continue.

15.  Install Ubuntu On Your Virtual Machine
The virtual machine has now been created but it is like a computer that doesn’t have an operating system installed yet.

The first thing to do is to boot into Ubuntu. Click the start icon on the toolbar.

This is the point where you need to choose the Ubuntu ISO file you downloaded earlier. Click on the folder icon next to the “Host Drive” dropdown.

Navigate to the download folder and click on the Ubuntu disc image and then on “Open”.

16.  Start The Ubuntu Installer
Click on the “Start” button.

Ubuntu should load into the little window and you will have the option to try Ubuntu or install Ubuntu.

Click on the “Install Ubuntu” option. 

17.  Check Your Virtual Machine Meets The Pre-requisites
A list of pre-requisites will be displayed. Basically you need to make sure your machine has enough power (i.e. plug it in if you are using a laptop), has over 6.6 gigabytes of disk space and is connected to the internet.

You also have the option of downloading updates whilst installing and to install third party software.

If you have a good internet connection check the download updates option otherwise untick it and leave the updates to install at a later point post installation.

I recommend checking the install third party software option as it will allow you to play MP3 audio and watch Flash videos.

Click “Continue”.

18.  Choose The Installation Type
The next step lets you decide how to install Ubuntu. As you are using a virtual machine select the “Erase disk and install Ubuntu” option.

Do not worry. This will not erase your physical hard drive. It will just install Ubuntu in the virtual hard drive created earlier on.

Click “Install Now”.

A message will appear showing you the changes that will be made to your disk. Again this is only your virtual hard drive and so it is safe to click “Continue”. 

19.  Choose Your Location
You will now be required to choose where you live. You can either select the place on the map or type it into the box available.

Click “Continue”.

20.  Choose Your Keyboard Layout
The penultimate step is to choose your keyboard layout.

You may find that the correct layout has already been chosen but it isn’t try clicking on the “Detect Keyboard Layout” option.

If that doesn’t work, click on the language for your keyboard in the left panel and then choose the physical layout in the right pane.

Click “Continue”.

21.  Create A User
The final step is to create a user.

Enter your name in to the box provided and give your virtual machine a name.

Now choose a username and enter a password to associate with that user. (repeat the password as required).

The other options are to log in automatically or require a password to log in. You can also choose to encrypt your home folder.

Here is a guide discussing whether it is a good idea to encrypt a home folder.

As it is a virtual machine you may as well go for the “Log in automatically” option but I usually recommend always selecting the “Require my password to log in”.

Click “Continue”.

Ubuntu will now be installed. 

When the installation has finished click the File menu and choose close.

You have the option to save the machine state, send the shutdown signal or power off the machine. Choose power off the machine and click OK.

22.  Install Guest Additions
The next step is to install the guest additions.

Click on the settings icon on the VirtualBox toolbar

Click on the storage option and then click on IDE and choose the little circle with a plus symbol icon which adds a new optical drive.

An option will appear asking you to choose which disk to insert into the optical drive. Click on the “Choose disk” button.

Navigate to the downloads folder and click on the “VBoxGuestAdditions” disc image and select “Open”.

Click “OK” to close the settings window.

When you are back at the main screen click the start button on the toolbar. 

23.  Open The VirtualBox Guest Additions CD In Ubuntu
Ubuntu will boot for the first time but you won’t be able to use it full screen until the guest additions are properly installed.

Click on the CD icon at the bottom of the launcher panel on the left and make sure there are files for VirtualBox Guest Additions.

Right click on an empty space where the list of files are and choose open in terminal. 

24.  Install Virtualbox Guest Additions
Type the following into the terminal window:

sudo sh ./VBoxLinuxAdditions.run


Finally you need to reboot the virtual machine.

Click on the little cog symbol in the top right corner and choose shutdown.

You will be given the choice to restart or shutdown. Choose “Restart”.

When the virtual machine restarts choose the “View” menu and select “Full Screen Mode”.

A message will appear telling you that you can toggle between full screen and windowed mode by holding down the right CTRL key and F.

Click “Switch” to continue.
Share:

Saturday, May 7, 2016

The Next Apple Watch May Support Cell-Network Connectvity


The next Apple Watch might potentially come with cellular connectivity. That means you’ll be able to use it, even if you decide to leave your smartphone at home.

Right now, the Apple Watch connects to your smartphone using bluetooth. It’s the same technology used to pair your smartphone to your car, or to things like wireless headphones and portable speakers. It work great, but it isn’t without its limitations, specifically, distance.

While your Apple Watch can work great with your phone in your pocket, chances are if you’ve strayed too far away you’ve noticed that red alert show up on the top of your watch letting you know it’s not longer connected to your phone. At that point some of the Apple Watch’s functionality still works, but most of it doesn’t.

Sources familiar with matter told The Wall Street Journal this week that Apple plans to add cell-network connectivity to the next version of the wearable, along with a faster processor.

The Apple Watch is currently right at a year old. Originally, Apple had been rumored to be announcing the next generation of the Apple Watch at the event it held in March.

Now, analysts believe that Apple will announce the next generation of the Apple Watch during its annual developers conference, WWDC, in May.
Share:

Friday, May 6, 2016

What Is 'Phubbing'? ජිවිතයට වැදගත් යමක් 200 වැනි පෝස්ටුවෙන් ... ALLSRILANKANS.BLOGSPOT.COM


හායි යාලුවනේ ඔන්න මම අදත් ආවේ ඔයාලට ඉතාමත් වැදගත් දෙයක් හොයාගෙන ඉතාම වේගයෙන් දියුණු වන සමාජයේ යන්ත්‍ර එකන්නම වැඩකරලා යන්ත්‍ර වගේ වැඩ කරන හදවත් වලට ජිවීතය ජය ගන්න පාඩමක් අරං ආවා. ඉතින් මේ වගේ පොස්ටුවක් කරන්නේ අද මම මට විශේෂ දවසක් නිසා මොකද කියනවානම් මේ තමයි මගේ බ්ලොග් එකේ 200 වැනි පෝස්ටුව. ඉතින් 2011 11 26 වැනිදා තමයි මම මේක පටන් ගත්තේ මෙන්න ඒක ඊට කලින් මගේ තවත් බ්ලොගයක් තිබ්බත් මන් මේකට එන්න මේකේ නම ගොඩක් වැදගත් උනා. ඉතින් එදා ඉඳලා හිමිට හිමිට මේ ආපු ගමනට මගේ යාලුවෝ දුන්න සප් එක නම් කියලා වැඩක් නෑ . හරි ඔන්න වැඩි කතා නැතුව මන් දැන් මගේ පෝස්ටුව පටන් ගන්නම්. 

හරි එහෙනම් මෙන්න What Is 'Phubbing'? ....

1.  Phubbing Is Phone-Snubbing Another Person

Yes, phubbing is phone-snubbing. This is when a person rudely snubs and ignores you in a social setting in favor of their smartphone. It's a very familiar situation: the person you are talking with gets a text message or an alert on their phone, or perhaps even an incoming call, and your presence is put on hold for several minutes in favor of the smartphone. The episode ends with a mumbled 'sorry about that', followed by festering tension for at least several minutes.

The phubbing is particularly rude if it's not even a text message, where the offender is busy checking Facebook or other social media.
PPhubbing - Wilkinson / Getty
PPHubbing = Spousal Abuse?. Wilkinson / Getty

2.  PPhubbing = Phone-Snubbing by Your Spouse

 The phubbing term also has a special variation, 'pphubbing' spelled with double P. PPhubbing is when your life partner phone-snubs you. And yes, pphubbing is sometimes more common than regular phubbing, precisely because your life partner believes that they get more social leeway as your spouse.
Phubbing - Jennifer Photography / Getty
Phone snubbing is a sad symptom of web culture. Jennifer Photography / Getty

3.  Origin of the Phubbing and PPhubbing Expressions

The phubbing expression is both a portmanteau (combination of two words) and a neologism (a relatively new word that is starting to become common). It traces to an Australian advertising agency, McCann Melbourne and their 'Stop Phubbing' campaign in 2012.
Phubbing is pandemic - Screenshot, McCann Melbourne
Phubbing is pandemic. Screenshot, McCann Melbourne

4.  How Bad Is Phone Snubbing Around the World?

It's bad. People everywhere are still learning how to balance social etiquette against the compulsion to be constantly connected. Handheld communications are still a novelty, and when it comes to tweenagers, the urgency of managing their digital identity is very pressing.

McCann Advertising has some interesting statistics available at their stopphubbing website.
phubbing intervention! - screenshot / McCann Melbourne
Phubbing intervention is possible!. screenshot / McCann Melbourne

5.  What Can You Do About Phubbing?

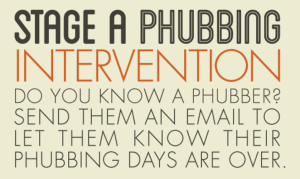
Like any uncomfortable communication, you can opt to say nothing to your acquaintance or friend, and just give them a disappointed gaze. Alternatively, you could turn it into a humorous moment, and write a 'phubbing citation' on a restaurant napkin and hand it to them. Or you could send a 'phubbing intervention' email from the nice folks at McCann advertising here. Yes, you can fill out this online form and have it emailed directly to the person who phone-snubbed you.

There are no guarantees that an email will achieve anything. But if you care enough about the person to give them supportive feedback, perhaps try the McCann email approach.

6.  More Text Talk Expressions

Along with 'phubbing', many strange expressions and acronyms have spawned as part of modern connected culture. About.com explains the popular text talk expressions here.
Too much cell phone use is psychologically unhealthy - Liam Norris / Cultura / Getty Images
Too much cell phone use is psychologically unhealthy. Liam Norris / Cultura / Getty Images

7.  Mental Health Effects of Overusing Your Cell Phone

While mobile devices are extremely useful, they can also pose serious psychological problems. Phubbing is often driven by obsessive-compulsive tendencies, and can feed narcissism and skewed views of oneself. Not to mention: phubbing erodes trust and respect between friends and spouses.
Phubbing is psychologically unhealthy - screenshot, McCann Melbourne
Phubbing is psychologically unhealthy. screenshot, McCann Melbourne

8.  Cell Phones Make You Less Connected?

When you spend time together with your child, your spouse, your friend, or your relative, but you are busy scrolling through your text messages, you are sending a poisonous message: 'my phone deserves more respect than you'.

Because of your personal fear of being disconnected, your phubbing is actually poisoning your personal relationships. You may have returned that text message promptly, but you've also sabotaged your connection with the person sitting beside you.

Addiction to cell phone usage is a growing mental health issue as many of us fall victim to the allure of high-speed communications. We need to be careful: staying digitally connected is good, but not at the cost of becoming socially dysfunctional because our smartphones constantly buzz.
Share:

Thursday, May 5, 2016

The 8 Best Windows Linux And Other Operating System Clones

According to Wikipedia's usage share of operating systems almost 10% of computers accessing the internet are still running Windows XP and a staggering 53% are running Windows 7.

Windows Vista never really gained momentum and has just under 2% of the market whilst Windows 8 is the second most popular operating system with 18% of the market. Windows 10 was released recently and has already gained 5% of the overall share.

Average users seem to like the simple interface of a panel, menu and icons on the desktop that Windows XP and Windows 7 offer.

Microsoft have somewhat acknowledged this fact by making Windows 10 appear a little bit more like Windows 7. Maybe Windows 8 was a step too far too quickly. 

Windows 10 is the future of computing for the foreseeable future and if Windows XP, Vista and Windows 7 users don't like it they have the choice to stick with what they have, learn to accept Windows 10 or move to another operating system such as Linux.

There are many Linux distributions out there which are designed to look like Windows and this guide lists the best ones. Why stop there though? Why not list Linux distributions that look like OSX, ChromeOS and Android as well.

1.  Zorin 9 - Windows 7 Clone

Zorin OS is a great replacement for Windows 7 users.

The general look and feel is the same as Windows 7 but it brings the security of Linux and it includes desktop effects and virtual workspaces.

Zorin OS comes with all of the applications that desktop users generally use including a web browser, audio player, email client, messenger app, remote desktop client, video editor, graphics editor and office suite.

If you want to try a different look then you can always go for the Windows XP layout by using the Zorin Look Changer.


2.  Zorin OS Lite

Zorin OS Lite is a 32-bit version of the Zorin Linux distribution built for older computers.

The default layout is like Windows 2000 but you can switch to a Mac style interface if you prefer it.

Zorin OS Lite comes with a suite of applications similar to the main Zorin OS but they are more lightweight.


3.  Q4OS

Q4OS is the perfect desktop replacement for Windows XP users.

It gives you an incredibly close experience to the Windows XP you are used to but is obviously built on top of the more powerful Linux operating system.

The operating system will run on all hardware, old or new and there is full support for printers and other devices.

You can choose to install a common set of software applications such as Google's Chrome browser, the LibreOffice suite and Thunderbird or you can simply install the applications you require one by one.


4.  Elementary OS

If you would like to try a Mac style interface but you don't want to spend all of your hard earned money on a new MacBook then try Elementary OS.

It has an easy to follow website, is incredibly easy to install and a desktop experience that has been very carefully crafted to look simplistic yet elegant.

The software is lightweight in nature and will run on most hardware.


5.  MacPUP

MacPUP has been built using Puppy Linux as a base distribution.

From a user's point of view however all you need to know is that the look and feel has been crafted so that you get a very similar interface to that of a MacBook.

It isn't quite as clean as Elementary OS but it will work on much older hardware and as it is built on Puppy Linux you can carry it around on a USB drive and boot it as required. 


6.  Peppermint OS

If you are looking for a Linux distribution to turn your laptop into a Chromebook then Peppermint OS is quite close.

It will take some customising to make it look exactly like ChromeOS but the ICE application lets you add web applications to your computer as if they are standard desktop applications.


7.  Chromixium

If you really want your laptop to function like a Chromebook then consider installing Chromixium.

The look and feel is almost a perfect copy of ChromeOS and it has benefits over the Chromebook in that you can install standard desktop applications as well as web applications.


8.  Android x86

If you are looking for an Android clone to run on your laptop then install Android x86 on your computer.

This isn't so much a clone as a port of the full Android operating system.

There are limitations to running Android on your desktop unless you have a touch screen. It has been designed to work on a tablet or phone.

Share:

Saturday, April 30, 2016

MICROSOFT එකේ TV Commercial ටික ඔක්කොම බලමුද ? මුල ඉඳලා අග වෙනකන්ම ආ ... ALLSRILANKANS.BLOGSPOT.COM


ඔන්න කස්ටියටම හායි කිව්වා අදත් අපි ආවේ ඔයාලට නියම ඉතිහාසයක් අරගෙන අද නෙට් එකේ ඔහේ කරක් ගහද්දි මට අහම්බෙන් හම්බුනා දෙයක් ඉතින් ඔයාලටත් දෙන්න මට හිතුනා. මෙන්න මේකයි කතාව ඔයාලා දන්නවනේ ට්වී එකේ යන ඇඩ් ඉතින් අද මට අහුවුණා මයික්‍රොසොෆ්ට් එකෙන් වින්ඩෝස් වලට දැම්ම ඇඩ් ටික ඒ කියන්නේ එයාලගේ මුල්ම ඩොස් OS එකේ ඉඳන් අද ඇවිත් තියන් 10 දක්වාම ඇඩ් ටික පට්ට හොඳේ ඔයාලත් බලලා කොමෙන්ටුවක් එහෙම දාලා බැනලා ගියාට කමක් නෑ  ...

මෙන්න ඩොස් වල ඉඳන් වින් 8 දක්වා


මෙන්න වින් 8.1 වල එක


මෙන්න වින් 10 වල එක


මෙන්න මෙයාලා වින් 95 එකේ ස්ටාර්ට් බට්න් එක හඳුන්වලා දුන්න විදිය


මෙන්න වින් 1 ඉඳන් වින් 10 දක්වා එයාලගේ වැඩ කෑලි ටික ඔක්කොම 


එහෙනම් ඔන්න අපි ගියා තවත් අලුත් දෙයක් සමග ඉක්මනින්ම හමු වෙමු අපි ඕල් ශ්‍රී ලංකන් බ්ලොග් ....
Share:

Friday, April 29, 2016

Here's how slow your laptop's USB Type C port could be


USB Type C is the intriguing new port that began appearing in laptops, tablets, phones, and other devices well over a year ago, but we had no real way test its throughput performance until now. Thanks to Sandisk’s Extreme 900, we’re finally able to push that tiny reversible port to its limits. To do that I gathered up no fewer than eight laptops equipped with USB Type C ports, and threw in a desktop PCIe card for good measure too.


The results speak for themselves in the benchmark chart below, ranked from highest- to lowest-performing. Each entry lists the laptop make and model along with the USB controller.


If You Wish More Info Follow the Following Link Source From also visit Here 


Share:

Thursday, April 28, 2016

මරණින් පසු ඔබේ Facebook ගිණුම කාටද ? මෙන්න උත්තරේ !


මුලින්ම කියන්න ඕනේ මේක හිරු සයිට් එකෙන් උපුටා ගත් එකක් මගේ බ්ලොගයේ යාලුවන්ටත් බලන්න මම දැම්මේ. ලින්ක් එක පල්ලෙහා තියනවා . 

ෆේස්බුක් කියන දේ මේ වෙනවිට ලෝකේ හැම දෙනෙක් අතරම ප්‍රසිද්ධයට පත්වෙලා ඉවරයි.  ඒ කියන්නේ ෆේස්බුක් ගිණුමක් නැති කෙනෙක් මේ වෙනකොට හොයාගන්නත් අමාරුයි. තමන්ගේ යාළුවෝ වගේම නෑදෑයෝ එක්ක විතරක් නෙවෙයි ෆේස්බුක් එකෙන්ම අලුතින්ම මුණගැහුණු අය එක්ක ගොඩ දෙනෙක් ඒ ඔස්සේ සම්බන්දකම් පවත්වනවා.  ඔවුන් එක්ක ඡායාරූප, වීඩියෝ ශෙයාර් කරගන්නවා, සමහර අවස්ථාවල පෙම්වතුන් වෙලා ඉන්නවානම් පැය ගණන් දවස් ගණන් චැට් කරනවා.

හැබැයි මේ හැමදේම අතරේ අපි කවදාහරි දවසක මේ ලෝකේ දාලා යනවා. එදාට අපේ ෆේස්බුක් ගිණුමට මොනවා වෙයිද ? මේ ගැන ඔබ කලින් හිතන්න නැතුව ඇති. හැබයි ඒ ගැන මේ වෙනකොට ෆේස්බුක් සමාගම හිතලා තියෙනවා.

ඔවුන් හඳුන්වාදෙන අලුත්ම විශේෂාංග තමයි ෆේස්බුක් ගිණුම් හිමියෙක් මියගියාට පස්සේ ඔහුගේ ගිණුමට වෙන දේ ගැන ඔහුට මියයන්නට ප්‍රථමයෙන් තීරණය කරන්න පුලුවන් අවස්ථාවක් උදාකරලා දෙන එක.

ඒ අනුව තමන්ගේ ගිණුම මරණයෙන් පසුව වෙනත් අයෙකුට පැවරීමේ හැකියාව තිබෙන බවයි ඔවුන් පවසන්නේ. නමුත් පවරන පුද්ගලයාට එම ගිණුමේ භාවිතා කල හැකිවන්නේ සීමා සහිතවයි. මියගිය පුද්ගලයාගේ පෞද්ගලික පණිවුඩ ඔහුට නැරඹීමේ හැකියාව නොමැති අතර Profile Pictures, Cover Photos වෙනස් කිරීමේ හැකියාව ඔහුට පවතිනවා. 

ඒ වගේම අවශ්‍යනම් මරණයෙන් පසුව තමන්ගේ ගිණුම අක්‍රීය කිරීමේ හැකියාවද මෙහිදී ඇතුලත් වෙනවා. නමුත් එය අක්‍රීය කිරීමට නම් ඔහු මියගිය බවට ෆේස්බුක් වෙත වෙනත් අයෙක් විසින් දැන්විය යුතු වෙනවා.  ඒ වගේම තමන්ගේ Facebok wall එක වෙනත් අයට එහි පණිවුඩ පලකල නොහැකි ලෙස සකසා ඇත්නම් මරණින් පසුව එය Unlock කර ඔහුගේ මරණය වෙනුවෙන් එහි ශෝකය පළකිරීමේ හැකියාවද මෙම නව විශේෂාංගය මඟින් හඳුන්වාදීමට ෆේස්බුක් සමාගම කටයුතු කරමින් සිටින බවයි විදෙස් මාධ්‍ය වැඩිදුරටත් වාර්තා කරන්නේ.

මෙය ඔබගේ ගිණුමට එක්කරගැනීමට Settings ඔස්සේ Security Settings වෙත ගොස් එහි ඇති Legacy Contact වලට මරණයෙන් පසු ඔබගේ ගිණුම හිමිවිය යුතු කෙනාගේ නම ඇතුලත් කළ හැකියි..

ඉතින් ඔයාලට ඔයාලගේ සෙටින්ග්ස් ටික හද ගන්න මෙතනින් යන්න


Share:

මෙතනින් එහාට හෙඩ් ෆෝන් ඉයර් ෆෝන් ගහන්න වෙන්නේ USB-C පොර්ට් එකකට


ඔන්න මම ආයෙමත් ආවේ ඔයාලට හොට නිව්ස් එකක් අරගෙන. කතාව තමයි අපි හැමෝම දැනට Sounds එලියට ගන්න එහෙමත් නැත්නම් හෙඩ්ෆෝන් , ඉයර්ෆෝන් වගේ දේවල් භාවිතා කරන්නේ 3.5mm පොර්ට් එකනේ ඉතින් දැනට ෆෝන් වල, ලැප් වල, ට්වී වල, සෙටප් වල හැම තැනම තියෙන්නේ මේක තමයි. ඉතින් ඔන්න මේක වනස් කරපු පළවෙනිම කට්ටිය තමයි ඇපල් සමාගම එයාලගේ අලුත්ම ෆෝන් වල එයාලා මේ අලුත්  USB-C තමයි භාවිතා කරන්නේ ඔන්න දැන් ඒකට ඉන්ටෙල් එකත් අතගහලා ඒ කියන්නේ ඉතින් අනිවාර්යෙන්ම පරිගණක ලෝකෙම වෙනස් වෙයි. මේ කතාව මෙන්න මේ විදියට තමයි කියලා තියෙන්නේ .

Apple isn’t the only company looking to remove the last vestiges of the analog world from our smartphones and tablets. Intel apparently wants in on the action too. The chip maker recently talked about replacing the 3.5mm headphone jack with a USB-C connector.

මේකෙන් එයාලා බලාපොරොත්තු වෙන්නේ


හරි එහෙනම් ඔන්න තවත් විස්තර බලා ගන්න ඕනේ නම් මේ සයිට් වලට යන්න


එහෙනම් ඔන්න අපි ගියා අයෙත් අලුත් දෙයක් එක්කන් ඉක්මනින්ම හමු වෙමු .
Share:

අපේ ලිපි කෙලින්ම Email එකට

Enter your email address:

Delivered by FeedBurner


මුහුණ පොතේ අපි

පැමිණ ගිය අය

අපේ යාලුවෝ